Glider Fabrication
Special Note for Teachers and Students
Of all of our STEM activities, Gliders is the most challenging (and therefore most rewarding) when it comes to building your actual physical model, and, also getting it to match your virtual (simulated) results. The optimum glide occurs when the glider flies at a "near stall", almost seemingly in "slow motion"! Many variables can affect the actual performance of your glider/s. For example, one very slight imbalance in your center of gravity can take a 7-second-glider down to 1-2 seconds just like that! At state level competitions, a 7-second flight is considered excellent, and would likely earn first place. At the national level, a 15 second flight would be considered "world-class"!
Trimming
With glider design and flight, a process called "trimming" is required: Trimming is the procedure for test flying and adjusting your model's flying surfaces in order to achieve efficient (maximum) flight times.
So, here in the Build and Test section, we want to pass along some of the "trade secrets" that are deeply rooted in STEM engineering principles, that students at the competition level employ in order to achieve maximum flight times. And at the end of this section, we will show you some basic trim techniques, again, rooted in the STEM principles you learned in the Research section of your Gliders STEM Application. Four quick additional notes:
- In the Gliders simulation, we are assuming a perfectly symmetrical glider, and, a straight flight pattern. So, a 7-second glider would be phenomenal. To go much beyond 7 seconds with straight flight would require it to almost fly in slow motion. So, by employing additional STEM knowledge, you can add to your flight time! For straight flight, a glider may move 15 feet, and average 3-5 seconds flight time. But in order to achieve i.e. 15 seconds, like some rare student national contest gliders have achieved in the past, your glider must travel i.e. 50-100 feet! But how? First, it must start from a very high point in the air; and second, in order to travel longer than straight flat flight, it must descend in a CIRCLE. So 15 seconds *IS* possible (with a real glider), but the glider must start high in the air, AND travel i.e. 100 feet, meaning, in a circle. It often lands in the same place it was launched. This circular path can be achieved by employing some of the additional STEM concepts that we outline in the Research section of the Gliders STEM Application (for example, yaw, roll, and with ailerons (i.e. augment one trailing edge of a wing), or perhaps you could employee lift on the horizontal stabilizer).
- Competition gliders are flown INDOORS in rooms with high ceilings. The density of the air is different inside than outside. Our simulation assumes "indoor air" as well. We also are assuming you are testing your gliders indoors with a high ceiling, like in a gymnasium.
- Competition students try to mimic the "airfoil" as presented in the Gliders STEM Application. Even though the wing material is already thin to begin with, competition students will sand their wings trying to replicate a true air foil, so much so that when you see a glider flying above, the edges all around are "translucent". This air foil exploits Bernoulli's as discussed in the Gliders Research content, and also creates a lighter glider while maximizing the surface area of the wing.
-
Competition students use Cyanoacrylate (CA) glue (versus wood glue), often referred to as
"super glue". Wood glue and other types of glue are heavier and take longer to dry. CA glue
is lighter and adds durability to the glider during the trimming process. CA glue comes in a
variety of thicknesses. Some participants may use one half (1/2) ounce of thin CA and one half (1/2)
ounce of filler CA, for a total of one 1 OZ, which is the maximum allowed for use in most competitions.
Accelerator spray is also used to quickly repair the glider during the trimming process.
Please read the warning labels of these types of glues. It takes a lot of practice and supervision to learn how to use these glues effectively, efficiently, and safely.
Preparation
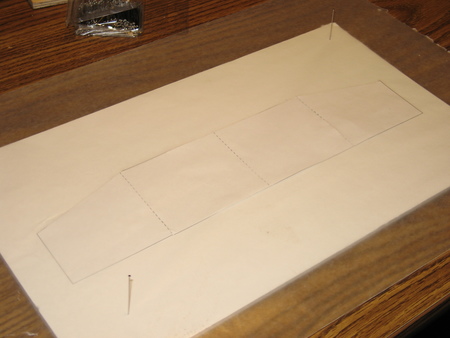
- Print the templates from the glider design you created and simulated in the Gliders STEM Application. Refer to the Print Template Tutorial for instructions. You can find the tutorial by opening the Help menu in the upper right-hand corner of your screen.
-
Gather materials and tools for fabricating your glider design.
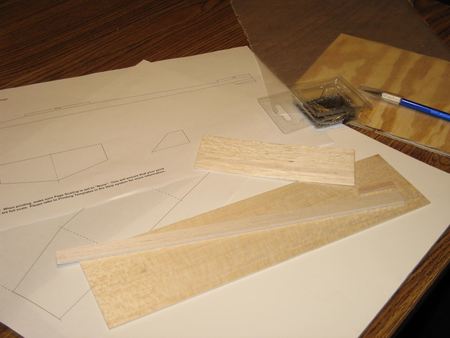
Materials
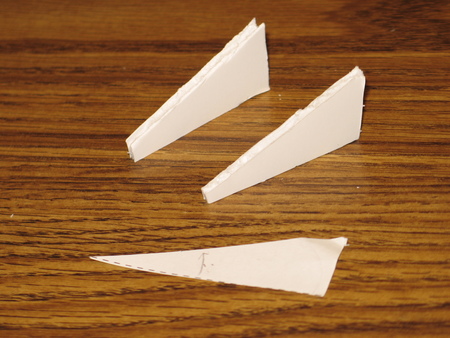
- Balsa blanks: fuselage, wings, stabilizers, and "shark tooth" material
- Clay ballast (5g maximum)
- Build board (foam board or styrofoam)
- Glue
- Wax paper
- Masking tape
- Sandpaper
Tools
- Scissors
- Hobby knife
- Cutting board
- Straight pins
Materials and Tools
- Using scissors, cut the template along the outer construction lines. If the template is printed on two pages, align the two halves of the template and tape together before cutting.
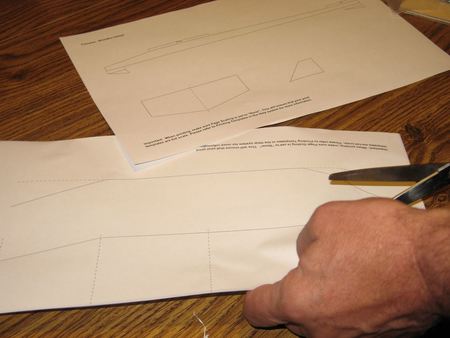
Cut Out Template
- Using a sanding block and sandpaper, taper the stock blank to form an airfoil design (see airfoil hint above). Use your templates to determine the surface area that should to be tapered to improve glider performance.
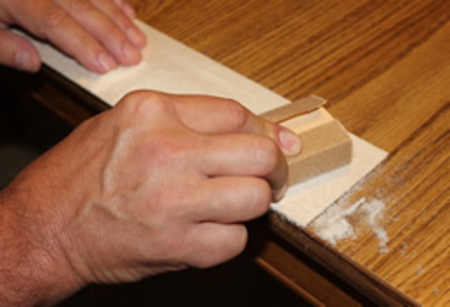
Taper Stock Blank
Part Layout and Cutting
- Align the wing template on the large balsa wing blank and attach in place with tack glue or tape.

Attach Wing Template
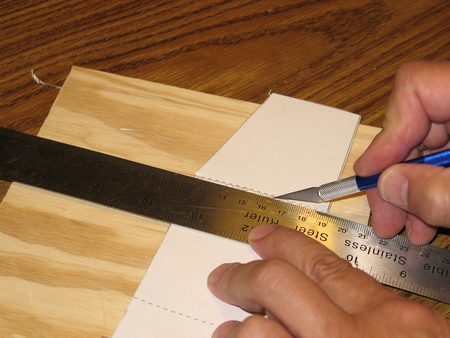
- Align a straight edge (ruler) along the template line and cut to shape with a hobby knife.
Cut to Shape
- For dihedral wing designs, crosscut the dihedral wing tip for reassembly at the designed angle. When cutting across grain, be sure your knife is sharp and make several cuts to insure a smooth cut. When working with wood, it is easier to cut with the grain (rip) than across grain (crosscut).
Crosscut Dihedral Wing Tip
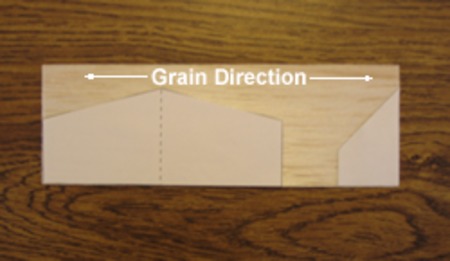
- Layout the horizontal and vertical stabilizers on the smaller wing blank. Grain direction is important! Wood is very weak when force is applied along the grain but is is much stronger when force is applied across the grain. What does this mean? The stabilizers (tail wing and rudder) will shear if the grain runs from front to back. The grain should run from the outer edges on the wing and the bottom edge to the top of the rudder.
Layout Stabilizers
- Repeat this process for each part of your glider: wing, horizontal stabilizer, vertical stabilizer, fuselage and launch hook
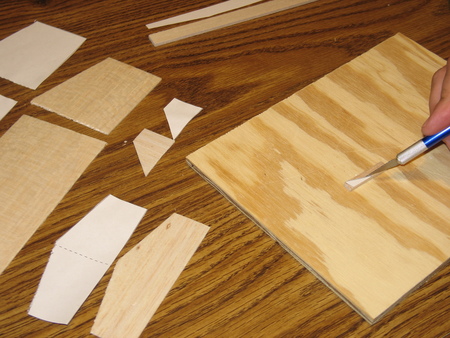
Complete Cutout Process
Dihedral Wing Fabrication
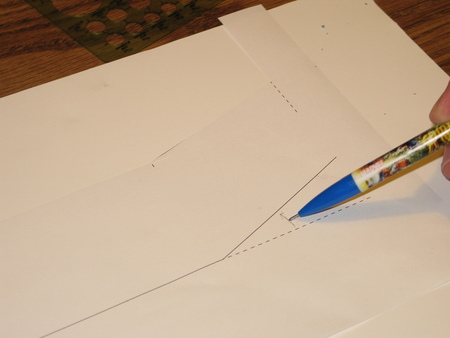
- The template provides an angle gauge for your dihedral wing design. With scissors, cut the angle template in preparation for making a fixture to use for wing fabrication.
Cut Angle Template
- Using the angle template as a guide, cut two angle fixtures from foam board to set the proper wing tip angle during fabrication.
Cut Angle Fixtures
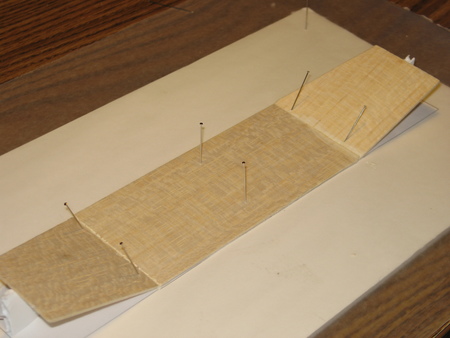
- Place the wing template on the build board and cover with wax paper.
Place Wing Template
- Align the angle fixtures on the wing template and pin in place.
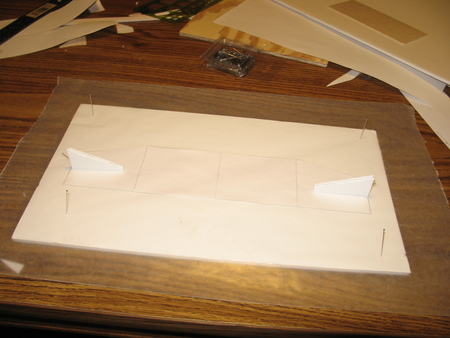
Align Angle Fixtures
- With the center wing part in place on the template, apply glue to the edge of the wing tip.
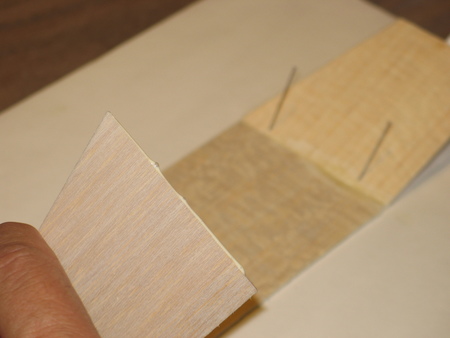
Glue the Wing Tip
- Assemble the wing tip to the center wing. Use straight pins to clamp the parts in place.
- Allow time for this sub-assembly to dry.
Assemble Wing Tip
Assembly
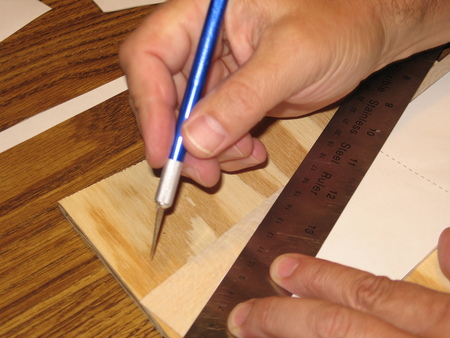
- Using your templates to measure, carefully mark the center line of the wing and horizontal stabilizer. This measurement is needed for proper placement on the fuselage.
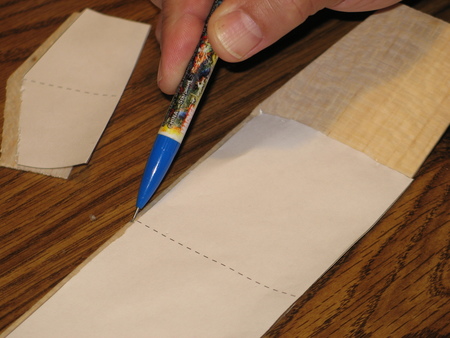
Mark Center Line
- Position the fuselage on the build board and hold in place with pins.
- Align the wing along the center line and glue in place.
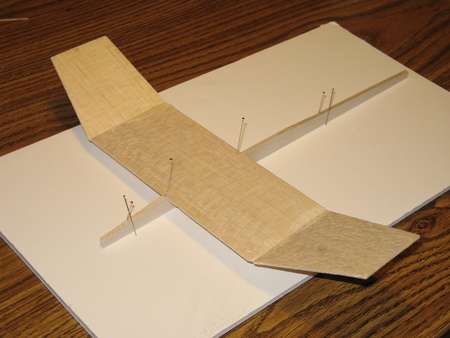
Position Fuselage
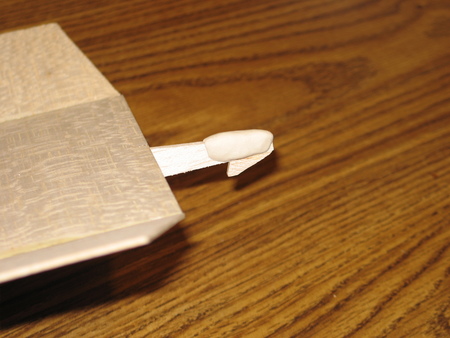
- Assemble the horizontal and vertical stabilizers. Use pins to hold the parts in place. Generally, the vertical stabilizer should be positioned perpendicular (90 degrees) to the horizontal stabilizer, unless you are intentionally employing a different STEM principal in order to affect your flight pattern.
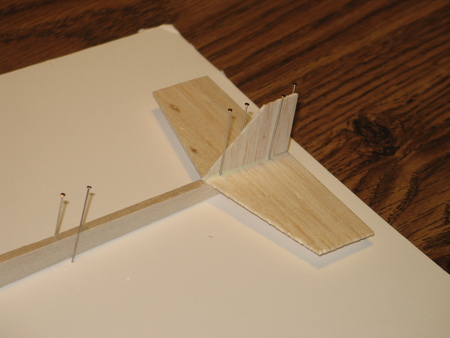
Assemble Stabilizers
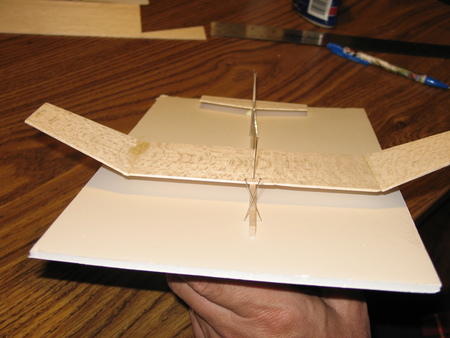
- Check the alignment of all components. Now for some "tweaking" and "trimming"... Do you want the wing and horizontal stabilizers to have the same incidence angles (or decalage as it is called)? And do you want your wing and stabilizer to align along the same plane (level)? Or do you want them to align on different levels? What if you are wanting to induce a circular flight path? Remember the discussion on LIFT and Bernoulli's in the Research section of Gliders? Would slightly tilting the stabilizer (as seen in this photo) help to induce a circular flight path? What benefits, if any, are there to having the wing and stabilizer glide through "clean air", that is, what benefits are there, if any, to your flight times if the stabilizer isn't hitting the turbulence created by the wing in front of it?
Tweaking and Trimming
- Add small amounts of clay ballast to the nose as specified in your engineering design, in order to affect your center of gravity.
Now you are ready for test flights!
Add Clay
Let's Launch Our Gliders
Basic Trim Techniques:
Now that you have built your glider you are ready to Test AND Trim! We are assuming here that you are testing your gliders indoors and in a space with high ceilings, like in a gymnasium. And remember, the optimum glide occurs when the glider flies at a "near stall", at a constant pace, almost seemingly in "slow motion"!
In order to maximize your flight times, and even surpass your virtual flight times, we would recommend the following:
- Launch Angle: Aim the catapult launcher at a steep angle towards the ceiling, so that when your glider's descent begins, it will be high in the air, and therefore will allow for more time to reach the ground.
- Circular Flight Pattern: By employing the STEM principles you learned in the Research section of Gliders, trim your glider in such a way that it will descend in a circular flight pattern. There are numerous ways to make circular flight paths occur. Balsa wood is very pliable, so two ways to cause turn are as follows: a) Breathe warm air on the fuselage right in front on the tail, while gently twisting just ahead of the tail, so that the left side is slightly higher than the right side. This is called "stab-tilt". (Or if possible, remove stabilizer and re-glue at a slight tilt). Remember the discussion on LIFT in the Research section of Gliders? Why would this adjustment induce a circular flight path? b) Another technique to induce turn, but less effective than stab-tilt, is to breathe warm air on the fin (rudder) and bend the fin to the left (or right, depending upon which way you want it turn). Will bending it to the left make it turn left or right? Recall the discussion on YAW in the Research section of Gliders?
Troubleshooting and Trimming Gliders
- Problem: Glider stalls then dives.
-
Perhaps a poor launch, and/or too much incidence angle, and/or too tail-heavy (center of gravity
and static margin not optimum). Try one or more of the following:
- Adjust (lower) launch angle
- Add clay ballast to nose
- Reduce incidence angle of stabilizer, by breathing on back of stabilizer and bending trailing edge down (this trailing edge of your stabilizer is called the "elevator"). From what you learned in the Gliders content, how would these changes affect your flight pattern?
- Problem: Glider dives straight ahead.
-
Insufficient wing incidence angle, and/or the glider is nose heavy. Try one or more of the following:
- Check "decalage" (or the difference between incidence angles of the wing and stabilizer - competition gliders are normally set at the same angle, but on different planes (or levels)... why different levels?) Why would it be advantageous to keep the two air flows and their drag inducing vortices, separated?)
- Breathe on and bend elevator (trailing edge of stabilizer) up.
- Check center of gravity (is it as you virtually modeled in Gliders?
- Remove some nose ballast (clay).
- Add some clay ballast to the tail.
- Problem: Glider climbs and flies straight, but you are desiring for it to fly in a circular path.
-
No turn is being induced, your glider is perfectly symmetrical. Try one or more of the following:
- Carefully breathe on fuselage and at the same time, twist just ahead of the tail to give it "stab-tilt".
- Remove stabilizer and re-glue with slight tilt.
- Bend the fin/rudder trailing edge towards the desired turn path.
- Problem: Glider climbs but doesn't roll out to transition and glide
-
Poor transition. Try one or more of the following:
- Breathe on stabilizer and bend left side of stabilizer down, and right side up, or vice versa
- Breathe on trailing edge of right wing and bend it down (or up)
- Breathe on trailing edge of left wing and bend it up (or down)
- Bend the fin/rudder trailing edge left (or right)
- Cut away some fin and/or stabilizer material if too large as compared to your virtual model templates.
- Problem: Glider loops after launch.
-
Too much up elevator (the trailing edge of the stabilizer is bent too high). Try one or more of the following:
- Breathe on stabilizer and reduce some of the elevator (reduce the upward bend of the trailing edge of the stabilizer)
- Increase nose ballast slightly.
- Inspect your decalage... are the incidence angles of your wing and stabilizer the same?
- Problem: Glider just rolls over and over again.
-
Too much lift on one wing. Try one or more of the following:
- Breathe on and bend trailing edge of wing that is dropping, in order to increase lift... based on the content you reviewed in Gliders, in which direction would you need to bend the wing in order to affect lift up or down?
- Breathe on and bend fin/rudder in the opposing direction of the turn.